With this tutorial we will setup the software that will allow you to upload data to OMERO. Then we will go through the steps of properly uploading your imaging data including additional metadata.
1. Install OMERO.insight
If you want to upload data from your own computer to OMERO or need to download large datasets we use OMERO Insight. Download it and follow the instructions to install it.
2. Download metadata template
Before you start up OMERO Insight, download this file and put it in the OMERO Insight config folder for your operating system:
Windows:
C:\Users\[User]\AppData\Local\OMERO.insight\app\configMac:
/Users/[User]/Library/Application Support/OMERO.insight/app/configLinux:
/home/[user]/.local/share/OMERO.insight/app/config
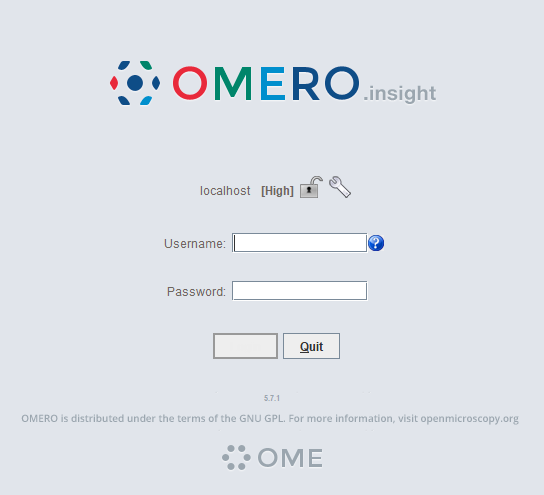
3. Set up the server
Once it is installed you need to add the OMERO server settings, start up the software and click the tool icon.
4. Add the Leiden test server
There should only be localhost, press the + sign to add the Leiden test server.
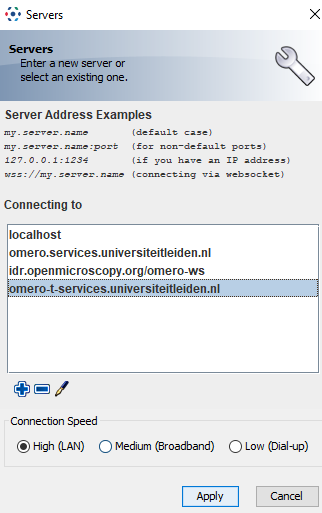
5. Connect to the server
Type in omero-t.services.universiteitleiden.nl and click apply, you will return to the first screen where you can now log in using your ULCN credentials.
You’ll end up in your home folder of the group you have been assigned to.
6. Understand OMERO’s data organization
Now you are logged in on the OMERO server.
OMERO has 2 levels of data organization: you can create Projects, each project can hold multiple Datasets. No additional levels are allowed.
7. Start the import
Go to File > Import, or click the import icon ![]()
8. Select files
Select the files you want to import and click on the > sign.
9. Choose project/dataset
This menu will appear:
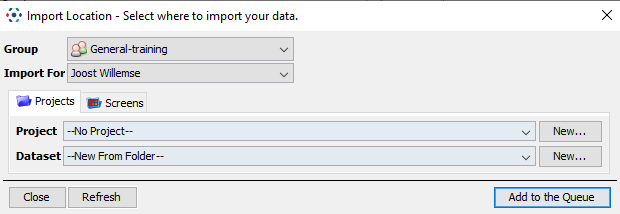
Here you can select an already existing project/dataset or create new ones.
10. Organize subfolders (optional)
If you have multiple datasets in one folder organized in subfolders on your computer, you can create the datasets from the subfolders. Note that this is the only sublayer allowed. If you have a folder in which the subfolder again have subfolders only the first subfolder will be taken into account.
This will work:
Project folder (selected folder)
├── subfolder 1 (moved to the right by arrow sign)
│   └── image 1 and so on
└── subfolder 2 (moved to the right by arrow sign)
    └── image 1 and so on
This will go wrong:
Project folder (selected folder)
└── subfolder 1 (moved to the right by arrow sign)
    ├── subfolder I (contains dataset of one experiment)
    └── subfolder II (contains dataset of a second experiment)
This will result in the datasets being merged into subfolder 1. To prevent this go into subfolder 1, and then select subfolder I and II and move them to the import tab. In that way two separate datasets will be created.
11. Add metadata
Next we will add experimental metadata to the images. Press the MDE button, next to Import.

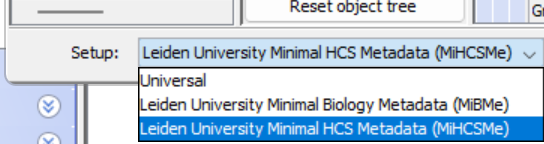
12. Choose metadata template
Use MiBMe (Minimal Biological Metadata), or MiHCSMe (Minimal High Content Screening Metadata), depending on your type of data (any biological imaging experiment or a high-content imaging experiment).
13. Fill in metadata
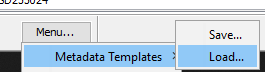
Fill in all data fields (first time only) or load your data via:
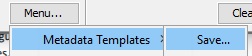
14. Save metadata for reuse
After filling in the first time save your metadata file for re-use. Next time you can load the template and only adjust the fields for that particular experiment.
15. Attach metadata template (optional)
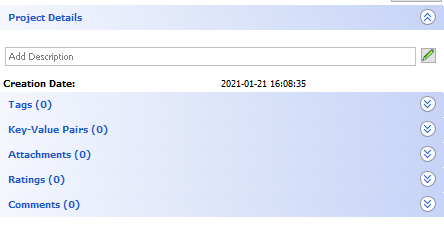
If you always want to be able to access this file easily (for example on a microscope computer), you can attach this file to the first dataset inside OMERO. After importing your data you will see that on the right you will see an option to add attachments.
16. Add local file attachment
Expand the attachment section and press the + icon. And select local file.

17. Upload metadata file
Select the file you just saved and attach it. Each time you are doing an experiment you can download this on the Microscope PC (In insight by right clicking and pressing download, on the browser by clicking the attachment), and put it in your folder of local microscope images. Then re-use it by opening it upon data import (see step 14).
18. Add tags (optional)
Additionally, you have the option to add tags to your images to make them easier to find back. You can do this by selecting the options tab in the import column.

19. Create or select tags
Click the + sign to add tags, a new menu will pop open:
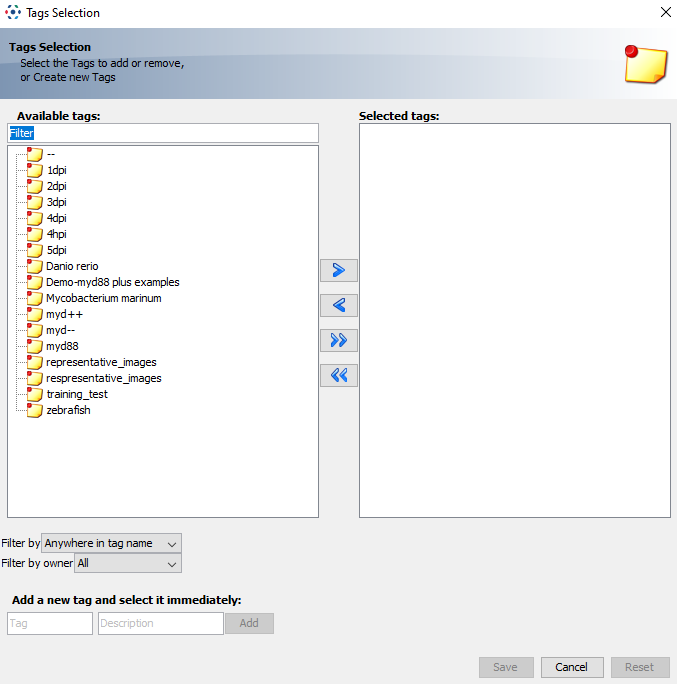
Here you can add tags that you have added before, or create new ones (at the bottom).
20. Import your data
Finally click the import button and all your images will be uploaded.