Installation and Setup
If you haven’t installed FIJI yet, download the latest version from https://fiji.sc.
Activate Update Sites
After installation, start FIJI and configure the necessary update sites:
Go to Help > Update
Click Manage Update Sites
Activate the following update sites:
Fiji Legacy
3D-Image suite
ImageScience
Leiden University
Click Close and Apply Changes
Basic Image Processing
In this exercise, you’ll learn fundamental image processing operations using HeLa cell images.
1. Open Sample Image
Open HeLa cells: File > Open Samples > HeLa cells
2. View Image Information
Press I or go to Image > Show Info to see how the image is constructed.
3. Split Channels
Open the Channel tool: Image > Color > Channel tool
Click the More button
Select Split channels
4. Process the Red Channel
The red channel shows bright spots on a strong cytoplasmic background.
Duplicate the red channel: Image > Duplicate
Remove background: Process > Subtract background
Adjust settings for the best result using the Preview button
5. Process the Green Channel
The green channel image is blurred and needs sharpening.
Change the background to black: Image > Adjust > Brightness/Contrast
Adjust the minimum value until the background is black
Try two different sharpening filters:
Process > Sharpen, or
Process > Filter > Unsharp Mask
Compare the results to see which works better.
6. Process the Blue Channel
Sharpen the image using the method that worked best for the green channel
Remove background signal using either:
Brightness/Contrast adjustment (Step 5), or
Subtract Background (Step 4)
Which method works best?
7. Merge Channels
Merge all channels: Image > Color > Merge channels
Compare the result to the original image
8. Adjust Look-up Tables
Your colleague mislabeled the pseudocolors. Green and red should be swapped.
Adjust the look-up tables: Image > Look-up tables
9. Practice on Your Own Images
Try these operations on your own microscopy images.
Brightness and Contrast
Understanding and controlling brightness and contrast is essential for image analysis.
1. Open Galaxy Sample
Open File > Open Samples > M51-galaxy
2. Auto-adjust Contrast
Go to Image > Brightness/Contrast
Click Auto to automatically adjust contrast
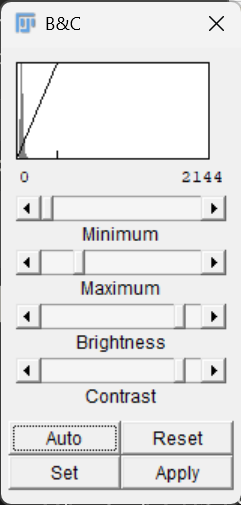
You’ll see 4 sliders in the Brightness and Contrast window. Experiment with all 4 sliders to see their effects.
3. Optimize Display
Try to display all intensities clearly without overexposing the image.
4. Apply Settings to Multiple Images
Open the M51 galaxy image a second time
In the first image, click Set in the Brightness/Contrast window
Carefully adjust the minimum and maximum displayed values
Check Propagate to all other open images
Click OK
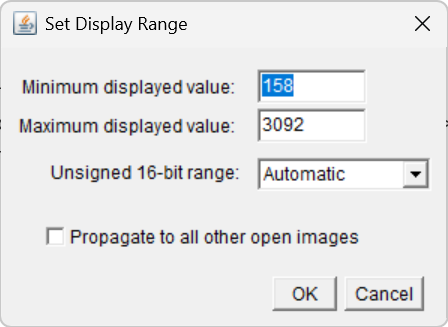
What happened to the second image? This feature is useful for comparing intensities between images.
5. Understanding Apply vs. Display
Select one image and click Apply in the B/C menu
Read the warning and click OK
What happened to the pixel values?
Try to lower the contrast
Close the images when finished.
Look-up Tables
Look-up tables (LUTs) control how pixel values are displayed as colors.
1. Explore Different LUTs
Re-open the M51 galaxy image and try these look-up tables (Image > Look-up tables):
Green
Fire
Red Hot
Glasbey
Which one makes the image look best?
2. Edit LUT Values
Go to Image > Color > Edit Lut
View all 256 assigned values of the look-up table
What is essential to see all density levels properly? (Hint: examine the Glasbey LUT)
Puzzle: Hidden Information
Test your skills by revealing hidden information in an image.
Open Plugins > LeidenUniv > Teaching > Get the answer
Use all the knowledge you’ve gained to reveal the answer
Hint
Try adjusting brightness, contrast, and different LUTs to reveal hidden text.